RGBW LED Controller v3.1

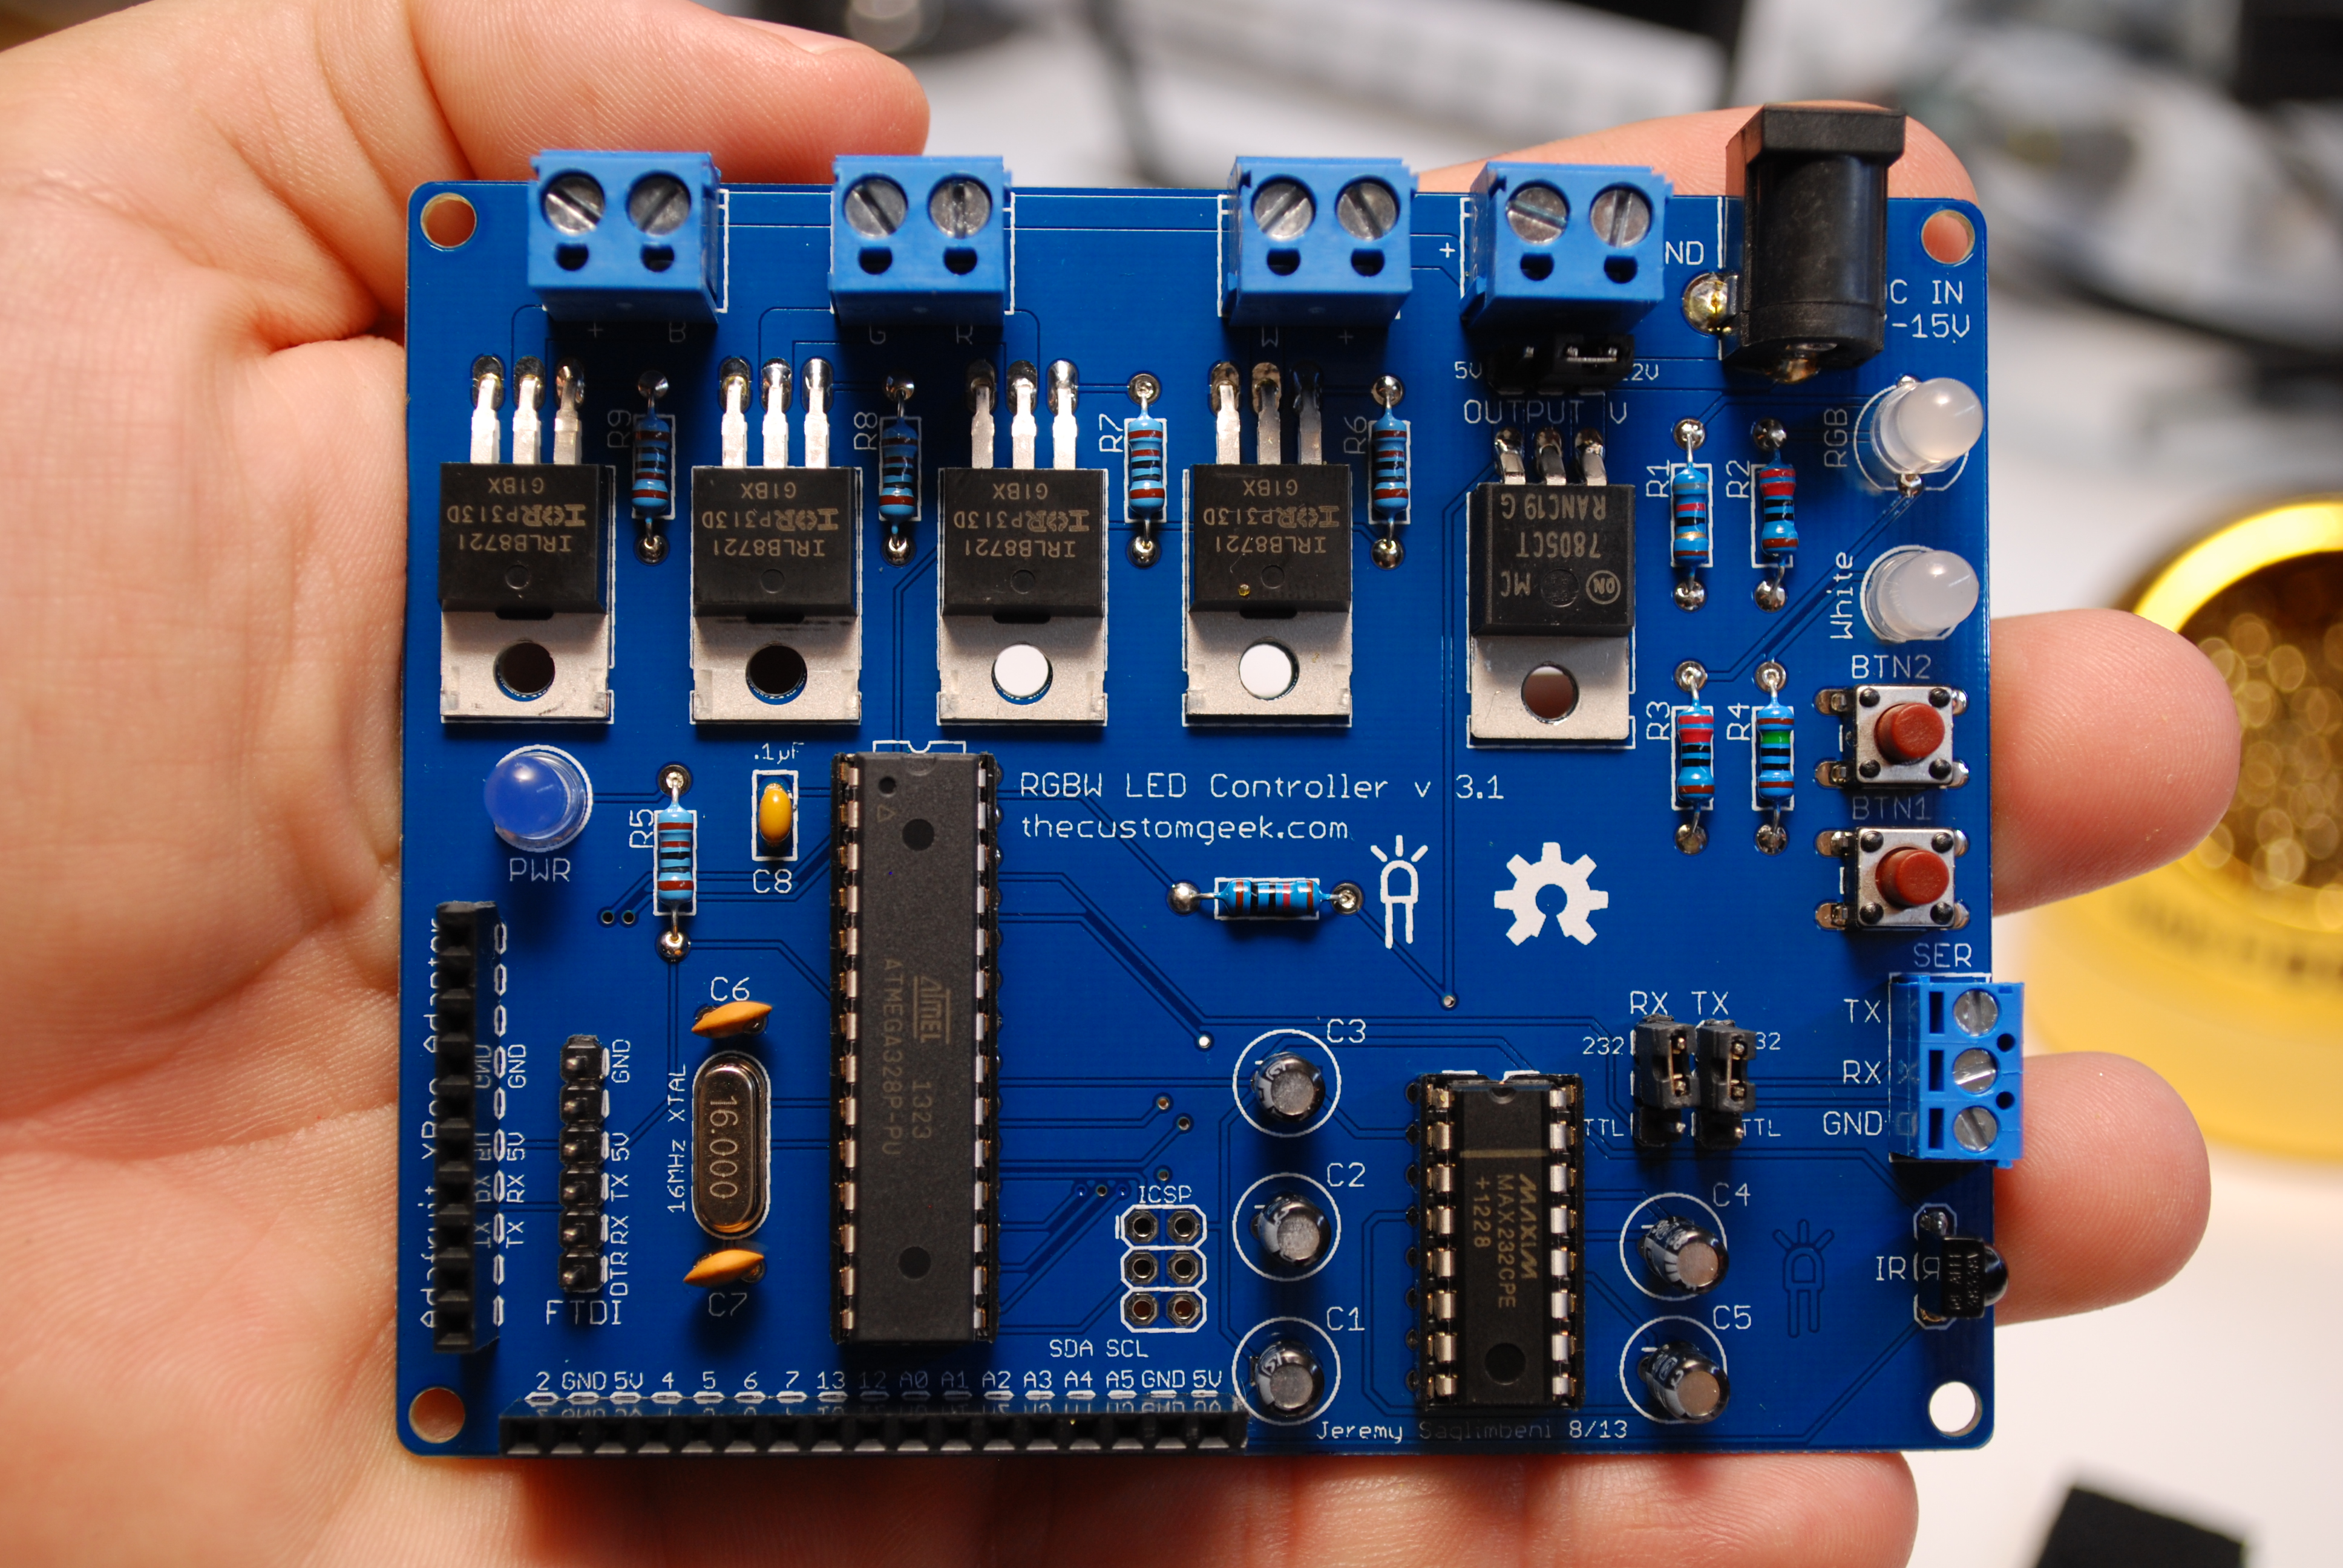
The new RGBW LED Controller is here! The video above shows some of the things it can do, but here is a list of improvements:

IRLB8721PBF MOSFET’s – More power!

Double sided and thicker board traces

More output headers

Cleaner board layout – All power and LED connections on one side – rounded corners

Improved serial capture method with feedback

Support for solid color commands (magenta, cyan, gold, RGB white, orange, light blue, light green, violet, pink, and RGB warm white)

More control from button inputs – long and short press commands

EEPROM memory of LED levels when powered off/on

IR control mode! – Full control of all channels and a memory recall function Get the remote here: http://www.adafruit.com/products/389

Wireless control via XBee! Get an Adafruit XBee adaptor here: http://www.adafruit.com/products/126

Backward compatible! The new software set will work on version 3.0, 2.2, and 1.9!

In stock and shipping from our store now!

New firmware and cad files available at https://github.com/jersagfast/RGBW-31.

The manual is here: RGBW LED Controller v31

RGBW31

Really Small(s) GPS

Hi peeps, I have been wanting to make a small GPS device (GPS receiver and some sort of screen) that I could carry around for a while now, but I didn’t want it to be too big, so I made this. Mission accomplished.

This unit is explained in the video above, but is basically a GPS receiver, 1 CR1220 battery for the RTC on the GPS breakout, one of my Square Inch of Goodness boards, one 128×32 OLED display, three 6mm buttons, and a 400mAh Li-Po Battery (from Sparkfun). It even has FTDI headers on it so I can update the firmware with ease (with my own FTDI adapter!). The awesome part is that all of those things fit in an Altoids Smalls tin, measuring 2.15″ (W), 1.35″ (L), and .56″ (H), or 55mm (W), 34mm (L), and 14mm (H).

The GPS breakout board is from Adafruit and uses the MTK3339 GPS module, and man does it work well. I have had other GPS modules that worked, but it was a fight. If you’re thinking about putting GPS in a project, use this. They also have a great library for it. They even have the raw MTK3339 GPS module if you want to use your board. Read the Adafruit product page for all the features, there are many.

The 128×32 OLED display is also from Adafruit, it works well and has the typical OLED crispiness. Very easy to read, even in sunlight, for the size and you can even multiply the text size if you want to.

So I’m going up to NY in a few days, and I wanted a new and exciting way to talk with the TSA folks, so I figured this would work. (kidding) If only Hollywood had not trained everyone to think a gadget with a few wires and a flashing red LED, that they didn’t understand, was a bomb.. ugh. (not kidding)

*UPDATE – there is a set on Flickr for this with teardown pictures.

*UPDATE #2 – Oops, I forgot to put the link to the code on Github. 0_0

Fast Voltage Switching FTDI Adapter

I have been working more with 3.3 volt projects lately and wanted to make programming them with an FTDI adapter as easy as possible. Sure you can switch most FTDI adapters from 3.3 to 5 volts (the FT232RL chip has a built in 3.3 output as well as logic level selection), but it involves scratching a jumper wire and soldering pads. This isn’t bad to do once, but to go back and forth is time consuming and rough on the boards.

So, I made my own FTDI adapter with an easily changed jumper for voltage selection. I also added a power LED to let me know that it’s plugged in and ready to go, threw in some RX and TX indicator LED’s and all required caps (read the data sheet), and mini USB jack. I ordered the boards from OHSPark.com, and as always, they were great.

Eagle files are on my Github page, or you can grab just the schematic in PDF format here.

Adafruit has an FTDI Friend and Sparkfun has an FTDI Basic if your not up to soldering 28 Pin SSOP packages, or just want one. 🙂

Get on board! (breadboard that is)

So, you have just made an awesome gadget using an Arduino. You love it. OH! wait, you just got another idea for a different great project! But then.. you have to take your old one apart.. Is there a way to have more than one Arduino project without having more than one Arduino?

Yes, by putting you project on a bread board, you can accomplish this task, as well as saving some coin and earning the bragging rights of building it yourself. The video above explains about how to do that. An Atmel ATmega328 IC will serve you greatly. All that is needed is the ATmega IC and a few external components, a crystal, a few ceramic caps, and an FTDI Friend or FTDI Cable interface.

The purpose of doing this is so you can develop more than one project at a time without having to buy additional Arduino’s, and the second is to test a circuit for production. Remember, and Arduino has a lot of handy circuitry on it that you might not want on your project. For example, you might not need power switching, ICSP header, or FTDI/8U2 circuitry. Transferring your project to a breadboard will allow you to see how your project will run with the ‘bare essentials’.

The circuit is surprisingly simple, so if you haven’t tried it, build a stand alone project. Adafruit even has great Arduino stickers so you can quickly and easily identify the pins. Below is a pin reference image. Happy building, it’s a lot of fun! Continue reading